Making flowers from fabric, paper, or foam might sound tricky. But trust me, it’s easier than you think. I started making artificial flowers three years ago. My first rose looked more like a crumpled tissue. Now I sell custom bouquets to local brides.
You don’t need fancy skills. You don’t need expensive tools either. This guide shows you everything. From picking the right materials to selling your creations. Let’s get started.
Why Make Your Own Artificial Flowers
Real flowers die within days. Artificial ones last forever. You can customize every petal. Pick any color you want. Match your home decor perfectly. Store-bought fake flowers cost $20-$50 per stem. Making them yourself? Around $2-$5 per flower.
My cousin saved $800 on her wedding flowers. She made 12 bouquets herself. They looked stunning. Plus, it’s actually fun. Put on some music. Grab your materials. Create something beautiful.
Understanding Artificial Flowers: Materials and Tools You’ll Need
You need the right stuff before starting. Don’t worry – most items cost less than $50 total.
Essential Materials for Artificial Flower Making

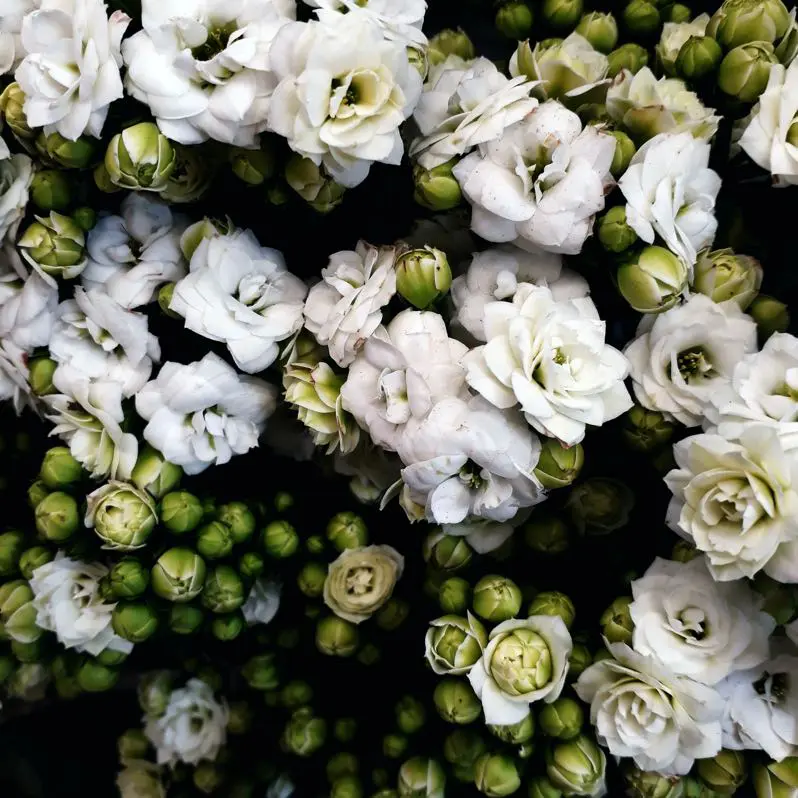
Fabric is your best friend here. Silk works beautifully but costs more. Satin gives you that glossy look. Polyester is budget-friendly and easy to work with. I use it for practice flowers. Crepe paper creates soft, delicate petals. It’s perfect for peonies and roses. Foam sheets are great for kids’ projects. They’re mess-free and simple to cut.
Wire stems hold everything together. Get 18-gauge wire for large flowers. Use 22-gauge for smaller blooms. I keep both types in my craft box. You never know what you’ll make next.
Floral tape comes in green, brown, and white. Green works for most stems. Brown looks natural on branches. The tape stretches as you wrap it. This helps it stick to itself.
You need good adhesive too. Hot glue dries fast but can be messy. Fabric glue takes longer but looks cleaner. I use hot glue for quick projects. Fabric glue for bouquets I’m selling.
Dyes and paints add realistic touches. Acrylic paint works on most materials. Fabric dye gives deeper colors. Mix colors to create natural shading. Real flowers aren’t one solid color.
Must-Have Tools for Beginners
Sharp scissors make clean cuts. Fabric scissors work better than regular ones. They don’t fray the edges. Keep them sharp. Dull blades ruin petals. Craft knives help with detailed work. Use them for tiny cuts. Or for creating leaf veins. Always cut away from your body. Safety first.
Ball stylus tools shape petals. Press them on foam pads. This creates natural curves. You can use a pen cap instead. It works almost as well. Leaf veiners add texture. Press them onto wet petals. They create realistic vein patterns. Some crafters use real leaves as molds. Nature makes the best templates.
Heating tools include soldering irons or candles. Heat shapes fabric petals beautifully. The edges curl naturally. Be careful with flames. Work in a ventilated area. I burned my first three attempts. Now I can shape petals blindfolded. Measuring tools keep petals consistent. Use a ruler for templates. Mark your cuts with chalk. Consistent sizes make flowers look professional.
Where to Source Quality Materials
Online craft stores have everything. Sites like Etsy sell starter kits. Amazon carries individual supplies. Buy sample packs first. Test different fabrics before committing. Local craft stores let you touch materials. Michaels and Joann Fabrics stock basics. They run sales every week. I buy wire and tape locally. Fabric I order online for better variety.
Budget-friendly alternatives exist everywhere. Old scarves become flower petals. Wire coat hangers make stems. My grandmother used coffee filters for roses. They looked amazing after dyeing. Eco-friendly options are growing. Recycled paper works great. Organic cotton costs more but feels better. Some crafters use plant-based dyes. These avoid harsh chemicals.
Types of Artificial Flowers You Can Make
Different materials create different looks. Pick what matches your skill level.
Fabric Flowers
Silk flowers look the most realistic. The fabric drapes naturally. Light passes through petals like real flowers. Professional florists use silk for high-end work. Brides love silk bouquets. Satin and organza create formal blooms. They catch light beautifully. Perfect for wedding decorations. Organza is sheer and delicate. Layer multiple petals for depth.
Cotton and linen give rustic vibes. These fabrics feel natural. They work great for farmhouse decor. I made cotton sunflowers last fall. They matched my kitchen perfectly.
Paper Flowers
Crepe paper is incredibly versatile. It stretches slightly when you pull it. This creates natural petal curves. You can find crepe paper at any party store. It comes in 50+ colors. Tissue paper makes delicate flowers. Layer multiple sheets for volume. Cut them all at once. Tissue paper flowers work great for parties. They’re cheap and quick to make.
Cardstock creates sturdy blooms. These flowers last longer. They hold their shape better. Use cardstock for large installations. Like photo booth backdrops.
Foam and Clay Flowers
Foam sheets are beginner-friendly. Cut shapes easily with scissors. No fraying or mess. Kids love making foam flowers. They’re safe and simple. Cold porcelain clay is moldable. Shape petals by hand. Add texture with tools. The clay air-dries in 24-48 hours. Paint it any color you want.
Air-dry clay works similarly. It’s slightly less detailed. But much cheaper than porcelain. I use air-dry clay for practice. Save porcelain for special projects.
Choosing the Right Type for Your Project
Wedding flowers need to look perfect. Use silk or high-quality crepe paper. These materials photograph well. Brides will hold these flowers all day. They need to feel nice too. Home decor can be more forgiving. Mix materials for visual interest. Combine fabric petals with paper leaves. My living room has a mix. Nobody can tell they’re different materials.
Durability matters for outdoor use. Foam and plastic-coated materials last longer. They resist moisture better. I made foam flowers for my porch. They survived two rainy seasons. Match your skill level honestly. Paper flowers are easiest for beginners. Silk flowers need more practice. Start simple. Build confidence first.
Step-by-Step: Making Your First Silk Rose
Roses look complicated. But they follow a simple pattern. I’ll walk you through every step. Take your time with each one.
Step 1: Creating the Petal Template
Grab a piece of cardboard or thick paper. Draw a teardrop shape for the petal. Make it about 2 inches tall. 1.5 inches wide at the base. Create three sizes of petals. Small ones for the center. Medium for the middle layer. Large for the outer petals. Real roses have graduated sizes too. This makes them look natural.
Draw 5 small petals. 7 medium petals. 10 large petals. Cut these templates carefully. You’ll trace them many times. Store templates in an envelope. Label each size clearly. You’ll use these for future flowers. I keep a template folder now. It saves so much time.
Step 2: Cutting and Preparing Fabric Petals
Place your fabric on a flat surface. Pin the template down. This prevents shifting. Trace around the template with chalk. It washes out later. Cut on the lines carefully. Don’t rush this step. Jagged edges show on the final flower. I cut all my petals while watching TV. It takes about 30 minutes.
Check the fabric grain direction. The threads should run vertically through the petal. This helps with shaping. Wrong grain direction makes petals fold oddly. Cut extra petals as backup. You might mess up during shaping. Better to have spares ready. I always cut 2-3 extra of each size.
Step 3: Shaping and Adding Texture
This step brings petals to life. Flat fabric becomes dimensional. You need heat for this part. Be very careful. Light a candle or use a soldering iron. Hold the petal edge near the heat. Not in it. The fabric will curl away from heat. This creates natural edges.
Work quickly but safely. Move the petal constantly. Don’t let it burn. I burned my first five petals. Now it’s second nature. Stretch the center of each petal gently. Use your thumbs to create a cup shape. Real petals curve inward. Don’t stretch too much. The fabric might tear. Add wrinkles for realism. Crumple the petal slightly. Then smooth it out partway. Real rose petals have subtle texture. Yours should too.
Step 4: Coloring and Detailing Petals
Real roses have color variations. Darker at the edges. Lighter in the center. We need to mimic this. Use a small brush and acrylic paint. Mix red with a bit of black. This creates depth. Start with a dry brush technique. Very little paint on the brush.
Paint the petal edges first. Use light strokes. Build up color gradually. You can always add more paint. Can’t remove it easily. Blend colors while they’re wet. Add some yellow near the base. Or pink on the tips. Look at real rose photos for inspiration. Nature is the best teacher. Let petals dry completely. This takes 15-20 minutes. Don’t rush it. Stack them carefully while drying. Painted sides facing up.
Step 5: Assembling the Flower
Cut your wire stem to desired length. 12-14 inches works for most projects. Bend a small loop at the top. This prevents petals from sliding off. Start with the smallest petals. Wrap one tightly around the wire loop. This forms the center bud. Use a dot of hot glue to secure it.
Add remaining small petals. Overlap them slightly. Create a spiral pattern. Real roses grow in spirals too. This looks more authentic. Wrap floral tape as you go. Start at the top. Stretch it slightly. Wrap it down the stem. The tape seals and hides the glue.
Add medium petals next. Place them between the gaps of small petals. This creates layers. Keep the spiral pattern going. Finish with large petals. These form the outer layer. Position them to frame the flower. Step back and look at your rose. Adjust petals as needed.
Step 6: Adding Stems and Leaves
Your rose needs a proper stem. Keep wrapping floral tape down the wire. Pull it tight as you spiral downward. Cut leaf shapes from green fabric. Roses typically have 5-7 leaflets per stem. Use the same shaping technique as petals. Heat the edges slightly.
Attach leaves with floral tape. Position them about 2 inches below the flower. Wrap them onto the stem. Add 2-3 leaf clusters down the stem. Paint leaf details if desired. Add darker green veins. A bit of yellow on the tips. This level of detail separates good flowers from great ones. Wrap the entire stem smoothly. Make sure no wire shows through. The tape should look seamless. Your first silk rose is complete.
Advanced Techniques for Realistic-Looking Artificial Flowers
Basic flowers look nice. Realistic flowers look stunning. These techniques take practice. But they’re worth learning.
Creating Natural Color Gradients

Real flowers fade from one color to another. We call this ombre or gradient. You need to blend colors smoothly. Start with your lightest color. Paint the entire petal base. Let it dry halfway. While still slightly damp, add the next color. Blend where colors meet. Use a damp brush. Feather the edges together. This takes patience. Rush it and you get harsh lines.
Try the dip-dye method for fabric. Mix dye in shallow containers. Dip petal edges for 3-5 seconds. The color bleeds upward naturally. Very realistic effect. Airbrushing gives the smoothest gradients. But airbrush kits cost $50-$100. Not necessary for beginners. I use regular brushes. Results are nearly as good.
Adding Realistic Details
Stamens are the flower’s center parts. Those little thread-like structures. Buy premade stamens online. They’re cheap. Glue stamens into the flower center. Before adding all the petals. They poke out naturally. Yellow stamens for roses. Black ones for poppies.
Create pollen effects with glitter or sand. Mix yellow acrylic paint with fine glitter. Dab it on stamen tips. This tiny detail makes huge impact. Real flowers have imperfections. Add small tears. Slight discoloration. Bent edges. Perfect flowers look fake. Imperfect ones look real. I tear one petal edge on every flower. Nobody notices but everyone thinks they look authentic.
Replicating Specific Flower Species
Each flower species has unique characteristics. Roses spiral. Peonies are full and ruffly. Orchids are delicate. Study photos before starting. Roses need that tight spiral center. The petals wrap around each other. Each layer slightly larger. Count the petals on real roses. Usually 30-40 total.
Peonies are all about volume. Use 50+ petals. Layer them loosely. Crumple them slightly. Peonies look messy but gorgeous. Orchids have distinctive shapes. Three outer petals. Two inner petals. One lip petal that’s different. Use wire armature inside orchid petals. They need support. Sunflowers have textured centers. Make these with painted foam or clay. Add individual “seeds” with brown paint dots. The center should be slightly domed. Not flat.
Working with Mixed Materials
Combining materials adds interest. Fabric petals with paper leaves. Foam centers with silk petals. Mix textures for depth. Wire armatures support large flowers. Bend thin wire to follow petal edges. Sandwich it between two fabric layers. This prevents drooping.
Beads make beautiful flower centers. String small beads on wire. Arrange them in a cluster. Pearl beads work great for elegant flowers. Ribbons can become leaves or accents. Satin ribbon folded and stitched creates leaf shapes. I use ribbon for tropical flowers. It has natural shine.
Common Mistakes to Avoid When Making Artificial Flowers
Everyone makes mistakes at first. Learn from mine instead. These errors ruined my early projects.
Material Selection Errors
Using fabric that’s too stiff ruins the look. The petals stand out awkwardly. They don’t drape naturally. Test fabric drape before buying. Let it hang. See how it falls. Too-thin fabric shows every mistake. Glue spots. Wire outlines. Uneven cuts. I recommend medium-weight fabric for beginners. More forgiving.
Wrong wire gauge causes problems. Too thin and flowers droop. Too thick and they look stiff. Match wire thickness to flower size. Bigger flowers need thicker wire. Cheap glue fails over time. The petals fall off. Centers come loose. Spend a few extra dollars on quality adhesive. Your flowers will last years.
Construction Mistakes
Overcrowding petals makes flowers look unnatural. Too many petals in one spot creates bulk. Space petals evenly. Let each one breathe. Uneven petal placement shows poor craftsmanship. The flower looks lopsided. One side heavier than the other. Step back frequently while assembling. Check from all angles.
Weak stem attachment points are common failures. The flower head snaps off at the stem. Always reinforce this connection. Use extra glue and tape. I lost my first wedding bouquet order this way. The bride was understanding but I was mortified.
Finishing Issues
Over-coloring makes flowers look painted. Too much pigment. Too little blending. Less is more with color. Build it up gradually. Under-coloring leaves them looking fake. Plain white fabric screams artificial. Even cream flowers need shading. Add depth to shadows.
Missing natural details breaks the illusion. No stamens. No color variation. No texture. These small touches separate amateur work from professional. Poor sealing lets projects deteriorate. Dust collects. Colors fade. Edges fray. Spray finished flowers with clear acrylic sealer. This protects them.
Caring for and Preserving Your Handmade Artificial Flowers
You invested time making these flowers. Protect that investment. Proper care makes them last decades.
Cleaning Techniques
Dust builds up over time. Even on artificial flowers. Use a soft brush every few weeks. Makeup brushes work perfectly. Blow dust away with compressed air. The kind for cleaning keyboards. Quick and effective. Don’t use it too close. The pressure might damage delicate petals.
For deeper cleaning, try this method. Fill a bag with salt. Add the flower. Shake gently for 30 seconds. The salt absorbs dust and oils. Brush off remaining salt. Some fabric flowers can be gently washed. Put them in a mesh laundry bag. Use cold water on delicate cycle. Air dry only. Never use the dryer. I’ve washed my cotton flowers this way. They look brand new after.
Storage Solutions
Never crush artificial flowers in boxes. The petals get permanently flattened. Use sturdy containers with dividers. Wrap each flower in tissue paper. This prevents scratching and rubbing. Colors won’t transfer between flowers. Label your storage boxes. Note what’s inside.
Store in cool, dry places. Avoid attics or basements. Humidity and temperature swings damage materials. My flowers live in a bedroom closet. Perfect conditions. Hang flowers if possible. Upside down prevents petal drooping. Use a coat hanger with clips. This works best for larger arrangements.
Repairing Damaged Artificial Flowers
Bent stems are easy fixes. Gently reshape the wire. Re-wrap with fresh floral tape. The tape hides any kinks. Loose petals just need more glue. Add a tiny dot where they attach. Press firmly for 30 seconds. Don’t use too much glue. It shows through fabric.
Faded colors can be refreshed. Paint over old colors with new. Blend carefully. Some flowers just need a light dusting of paint. Crushed petals respond to heat. Hold them near steam from a kettle. The fabric relaxes. Reshape while warm. Let cool completely. I’ve saved dozens of flowers this way. Don’t throw them out yet.
Creative Projects and Uses for Handmade Artificial Flowers
Now you can make flowers. What should you create? Here are my favorite projects.
Home Decor Applications
Create permanent centerpieces. Mix different flower types in one arrangement. Add faux greenery for balance. Change them seasonally. Spring pastels. Fall oranges and reds. Make a statement wreath. Attach flowers to a foam wreath form. Cover it completely or partially. Hang it on your door year-round. No wilting or watering needed.
Wall art becomes dimensional with flowers. Glue them to a canvas. Create patterns or random clusters. My daughter has a flower initial above her bed. She chose every bloom. Hanging installations look amazing for parties. Suspend flowers from fishing line. Create a flower wall or ceiling. I did this for my sister’s baby shower. Everyone took photos in front of it.
Wedding and Event Decor
Bridal bouquets save hundreds of dollars. Make them months in advance. No last-minute stress. The bride can keep hers forever. Real flowers die after the wedding. Boutonnieres and corsages stay fresh all day. No wilting in the heat. No water tubes to worry about. I made 15 boutonnieres for a wedding party. Total cost? $30.
Ceremony backdrops create stunning photos. Build a flower arch or wall. Use foam boards as the base. This looks expensive but costs $100-200 to make. Rentals cost $500+. Table centerpieces can be elaborate. Since they’re reusable, you can go big. Tall arrangements. Cascading designs. Sell them after the event. Recoup your material costs.
Gift and Fashion Ideas
Flower crowns never go out of style. Attach blooms to a wire headband. Or braid them into a circle. Music festival girls love these. Sell them at local markets. Hair clips add natural beauty. Glue small flowers to bobby pins or barrettes. Simple but elegant. I made matching sets for mother and daughter. They sold immediately.
Brooch pins turn flowers into jewelry. Attach a pin back to any flower. Wear on jackets, bags, or hats. Vintage-style brooches sell well on Etsy. Gift toppers beat boring bows. Attach a handmade flower to presents. The flower becomes part of the gift. My family requests these now. No more traditional bows.
Starting a Small Business
People will pay for quality handmade flowers. Especially custom colors and designs. Start small. Sell to friends first. Price based on materials plus time. Calculate your costs. Add hourly rate. That’s your minimum price. Don’t undervalue your work. Handmade deserves fair prices.
Market on social media. Instagram and Facebook work great. Post process videos. Show before and after. I got my first three clients from Instagram. All through friends sharing my posts. Local bridal shops might sell your work. Offer them a commission. They get unique products. You get customers. Some florists buy artificial flowers to supplement real ones.
Sustainable and Eco-Friendly Artificial Flower Making
Making artificial flowers can be green. You just need to think about it. Small choices make big impacts.
Using Recycled and Upcycled Materials

Old clothes become flower petals. That stained silk blouse? Cut off the stain. Use the rest. Thrift stores sell damaged clothes cheap. Perfect for crafts. Paper waste includes office paper and newspapers. Shred them for flower centers. Or use whole sheets for petals. Coffee-stained paper looks vintage and natural.
Fabric scraps from sewing projects work great. Even tiny pieces can become small flowers. Ask friends who sew. They’ll probably give you scraps free. Wine corks make excellent flower bases. Cut them in half. Glue petals around them. I made a whole bouquet using cork bases. Very rustic look.
Natural Dyes and Non-Toxic Adhesives
Plant-based dyes are surprisingly vibrant. Beets make pink. Turmeric creates yellow. Blueberries give purple. Boil the plant material. Strain it. Soak your fabric. These dyes smell better than chemical ones. No harsh fumes. Safe for kids to help with. Colors fade faster though. Consider this for long-term projects.
Flour paste works as adhesive. Mix flour and water to thick paste consistency. It dries clear and strong. Not waterproof though. Only for indoor flowers. Beeswax seals and protects. Melt it slightly. Brush onto finished flowers. It adds subtle sheen. Plus it smells amazing.
The Environmental Impact Compared to Real Flowers
Real flowers seem natural but have hidden costs. They need water, pesticides, and transportation. Cut flowers travel thousands of miles. Often by air freight. Artificial flowers last years. One handmade flower replaces dozens of real ones over time. Less waste. Less transportation. Less resource use.
But plastic-based materials aren’t perfect. They don’t biodegrade easily. Choose natural fibers when possible. Cotton, linen, and paper break down eventually. Reusable flowers reduce overall consumption. You’re not buying new ones every week. Not throwing away dead blooms. This matters more than most people think. I keep artificial flowers in my home. Buy real flowers only for special occasions.
Resources and Next Steps for Aspiring Flower Makers
You’ve learned the basics. Where do you go from here? These resources helped me improve.
Recommended Books and Courses
“The Fine Art of Paper Flowers” by Tiffanie Turner is comprehensive. Beautiful photos. Clear instructions. Worth every penny. Check your library first. Mine had a copy. YouTube channels offer free education. Search for “realistic fabric flowers.” Watch multiple creators. Different people explain things differently. Find your teaching style match.
Skillshare has flower-making classes. The subscription gives access to hundreds of courses. Try the free trial first. I learned advanced techniques there. Local craft stores sometimes offer workshops. Michaels and Joann have weekly classes. Usually $20-40 per session. You get hands-on help. Plus you meet other crafters.
Joining the Artificial Flower Making Community
Facebook groups connect you with other makers. Search “artificial flower crafts” or “DIY flowers.” People share tips, photos, and encouragement. Instagram hashtags lead to inspiration. Follow #paperflowers #fabricflowers #handmadeflowers. Save posts you want to try. I spend way too much time scrolling flower photos.
Reddit has crafting communities too. The crafts and somethingimade subreddits welcome flower posts. Ask questions there. Get honest feedback. Local crafting circles meet regularly. Check libraries and community centers. Some groups focus specifically on flower making. Real-life connections beat online ones sometimes.
Expanding Your Skills
Try new flower types regularly. Challenge yourself with complex species. Orchids. Dahlias. Proteas. Each flower teaches different techniques. Experiment with unusual materials. Metal foil. Leather. Felt. Wood veneer. Some of my best flowers use unexpected materials.
Learn related crafts for crossover skills. Embroidery adds detail to petals. Jewelry making helps with wire work. All crafts connect somehow. Take your work to the next level gradually. Don’t compare your chapter one to someone’s chapter twenty. You’ll get there. Just keep making flowers.
You now know how to make artificial flowers from start to finish. You’ve learned materials, techniques, and troubleshooting. Start with simple paper flowers. Build confidence there. Move to fabric when you’re ready.
Your first flowers won’t be perfect. Mine weren’t either. That’s completely normal. The beautiful thing about artificial flowers? You can fix mistakes. Real flowers just die.
So grab some paper and scissors. Make your first bloom today. Don’t overthink it. Share your creations with friends. Join online communities. Keep learning and improving.
Before you know it, people will ask where you bought your gorgeous flowers. You’ll smile and say you made them yourself. That feeling never gets old.

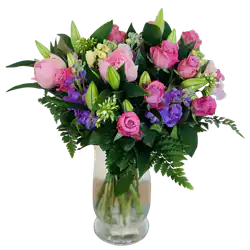
Valentine’s Day Roses Collection – Luxury Bouquets by Online Flower Company
May – a month which welcomes an abundance of flowers, but there is one stem whose return truly sets hearts aflutter. From late April the peony, cel…

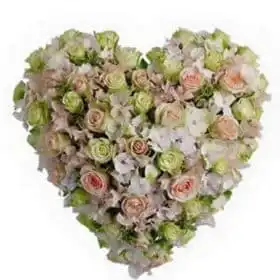
Seasonal favourite: Peonies
Whether it’s the hue of a precious gem or a stem that reminds them of a special time or place – our florists take inspiration from a plethora of su…

How to dress a festive table
For those of you hosting this Christmas, read on; it’s time to polish up the cutlery, bring out the china plates, and brush up on our top tips on…